Clackamas Community College

CH 104: INTRODUCTORY CHEMISTRY

Contact instructor:

Eden Francis

Physical Science
19600 Molalla Avenue
Oregon City, OR 97045
(503) 594-3352
TDD (503) 650-6649

Lesson 1: Lab Fundamentals I

Measurement: Volume and Temperature

Another measurement that you will be doing frequently is to measure the volume of a substance. We often think only of measuring volumes of liquids, but all matter takes up space so all matter has a volume (even gasses!). We'll discuss how to take accurate volume measurements and then you'll get a chance to try it out in the lab. This section will also review measuring temperatures accurately and precisely.

Volumes of Liquids | Volumes of Solids | Temperature Measurements

Volumes of Liquids

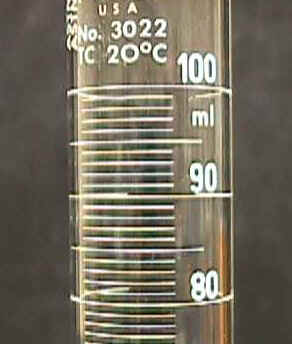
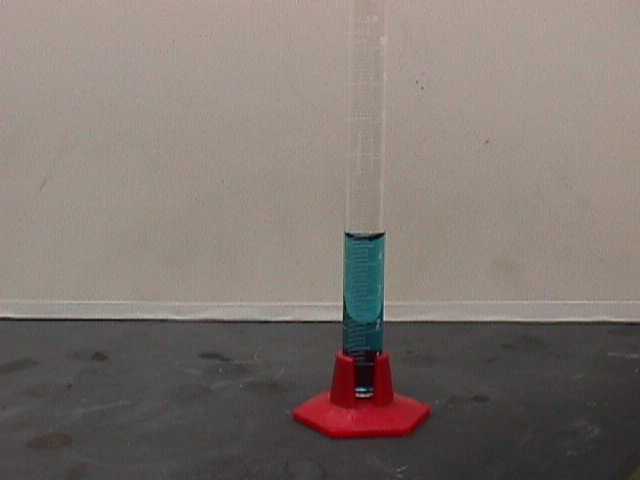
In this class, you'll most often measure the volume of a liquid using a graduated cylinder. There are other types of glassware that can measure volume but, for our purposes, graduated cylinders have enough precision as well as being relatively easy to use.

Three graduated cylinders. {104vol01.jpg (23000 bytes)}

You should be able to measure the volume of liquids in a graduated cylinder. How precisely you can measure volume depends on the size and type of graduated cylinder you use. Generally, you should be able to estimate between the etched or printed lines.

Divisions on 10-mL cylinder. {104vol05.jpg (16504 bytes)}

It is important to notice what each line or interval on the graduated cylinder represents. Different kinds of graduated cylinders are set up differently. A 10 milliliter cylinder, for example, usually has one tenth of a milliliter for each graduation, but some have two-tenths milliliter for each graduation. The way to check this is to count the divisions between consecutive numbers. Here we have the usual 10 divisions from one number to the next; therefore, the volume increment for each of those lines is a tenth of a milliliter. Estimating your measurements by reading between the lines, you should be able to measure to a hundredth of a milliliter.

Divisions on 100-mL cylinder. {104vol04.jpg (20376 bytes)}

On this 100 milliliter cylinder, the numbers are 10, 20, 30, etc., so there is a 10 milliliter increment between them. Since there are 10 divisions between consecutive numbers, each division represents one milliliter. Therefore, you should be able to estimate to tenths of a milliliter by reading between the lines.

Graduated cylinders with 5 divisions between numbered marks. {104vol06.jpg (23048 bytes)}

On some cylinders, there may only be five divisions between numbers. Or there may be ten divisions for a 2 milliliter increment. In these cases, each of the divisions represents 0.2 milliliters, rather than 0.1. You need to be aware of that when you're using the cylinders like these, and adjust your between-line-estimates accordingly.


The Meniscus

Close-up of meniscus. {104vol07.jpg (17576 bytes)}

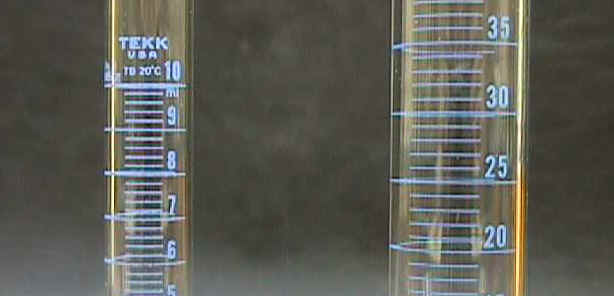
A characteristic of liquids in glass containers is that they curve at the edges. This curvature is called the meniscus. You measure the level at the horizontal center or inside part of the meniscus. With water in glass, the meniscus will curve up at the edges and down in the center so we say you read the bottom of the meniscus. The volume of liquid in this cylinder is 5.90 mL (not 6.10 mL!).

One other important technique when measuring volume is to view the meniscus at eye level; if you read the volume looking down (or up) at an angle, you will not get an accurate reading. Don't lift the graduated cylinder up off the counter but instead sit, bend, or squat down so that the cylinder stays on the counter and you bring your eye level down to the read the level of the meniscus.

Mercury meniscus. {104vol15.jpg (19923 bytes)} 
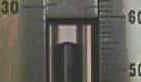
There are some materials where the curve goes the other way. Still, you read the horizontal center of the meniscus. In this case it would be the top of the meniscus.
Flat meniscus of water in plastic. {104vol14.jpg (12720 bytes)}

In some plastic cylinders water has a flat surface. In that case top or bottom doesn't matter, but we can still say use the center rather than the edges.

Meniscus with card behind. {104vol10.jpg (20652 bytes)} Meniscus with card below. {104vol11.jpg (19754 bytes)}

The visibility of the meniscus can be enhanced by using a card with a dark stripe on it,  placed behind the cylinder.  Adjusting the placement of the card can give you either a white meniscus against a black background or a black meniscus against a white background.

Now, or when you are in the lab, read through the instructions and complete Exercise 29 in your workbook, and have an instructor check the volume measurements that you make.

Top of page

Volumes of Solids

Cup of sugar. {104vol16.jpg (14352 bytes)}
Solids with regular geometric shapes. {104vol17.jpg (16243 bytes)}

Solid samples also have volume. If they are powder or granular you can measure their volume the same as a liquid, a cup of flour or sugar, for example.

If the sample is in a regular geometric shape, its dimensions can be measured and its volume calculated.


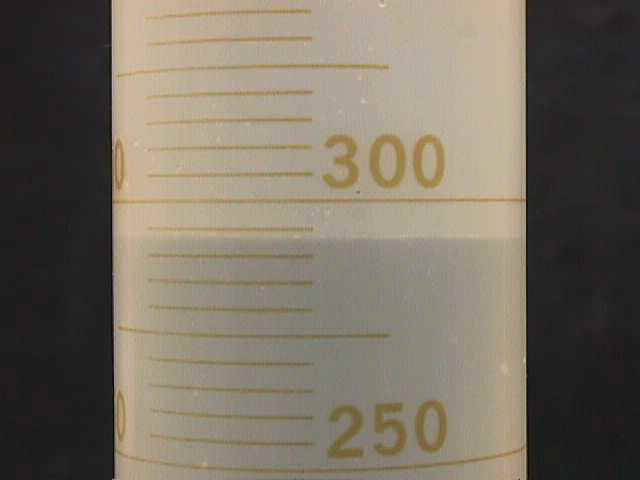
The volume of a solid sample can also be measured by displacement. (Just be sure your solid won't dissolve in the water!) This usually involves three steps:

Cylinder with blue water. {104vol19.jpg (11833 bytes)}
Add solid to cylinder with blue water. {104vol20.jpg (13972 bytes)}
Cylinder with blue water and solid. {104vol21.jpg (12062 bytes)}

1) measure the volume of liquid in a partially filled graduated cylinder,

2) add the solid (making sure it is submerged) and note how the level of the liquid goes up, 3) measure the combined volume of the solid and liquid. The difference between the initial and final volumes is the volume of the solid.

Top of page

Temperature Measurements

Another objective for this lesson is to use the Celsius or centigrade temperature scale to measure the temperature of fluids. Liquids and gases are both fluids.

The laboratory thermometers we have are calibrated in degrees Celsius rather than degrees Fahrenheit.

The Celsius scale used to be called the centigrade. It was called centigrade because the difference between the freezing temperature of water and the boiling temperature of water is divided into 100 degrees. 0oC is defined as the temperature at which water freezes and melts. 100oC is defined as the temperature at which water boils (using normal pressure). It is the scale commonly used in scientific work and in everyday use in most countries.

Diagram showing Celsius and Fahrenheit scales. {104exTCF.gif (481078 bytes)}Thermometers showing degrees F and degrees C. {104tmp22.jpg (29186 bytes)}
Thermometers showing partial immersion mark. {104tmp23.jpg (23201 bytes)}

The laboratory thermometers we use are partial immersion thermometers. This means they are calibrated to read correctly when the end of the thermometer (up to a certain mark) is in the liquid being measured but the temperature scale is not. When you are measuring temperatures, you might want to experiment to see how much difference it makes to vary the depth of the thermometer in the liquid.

Thermometer in water to partial immersion mark. {104tmp24.jpg (10186 bytes)}

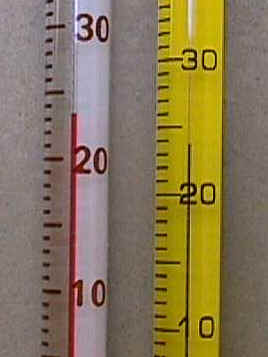
These thermometers do not have to be shaken down. Quite a few laboratory thermometers have been broken by trying to shake them down next to a table.

It is best to hold a thermometer while using it. The container it is in may or may not be able to support it. All you have to do is put the thermometer in the liquid and watch the mercury or alcohol level change. When it stops changing, read the mercury level or the alcohol level if you use one of the red ones. That is your measurement. You don't have to wait a prescribed length of time, just let it come to a rest. 

Two thermometers at about 23. {104tmp25.jpg (24092 bytes)}

You may have turn the thermometer to see the numbers and line up the mercury or alcohol with the scale.

Two thermometers at about 23.0 (turned). {104tmp26.jpg (23262 bytes)}


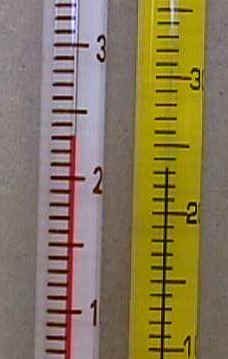
When you read them you should estimate between the lines, the same as you did with the length and volume measurements. Try to mentally divide the sections into 10 equal parts in order to read to a tenth of a degree.

Now, or when you come to the lab, do Exercise 30.

Top of page